
Wednesday, 24 October 2012
Dreadnought base complete
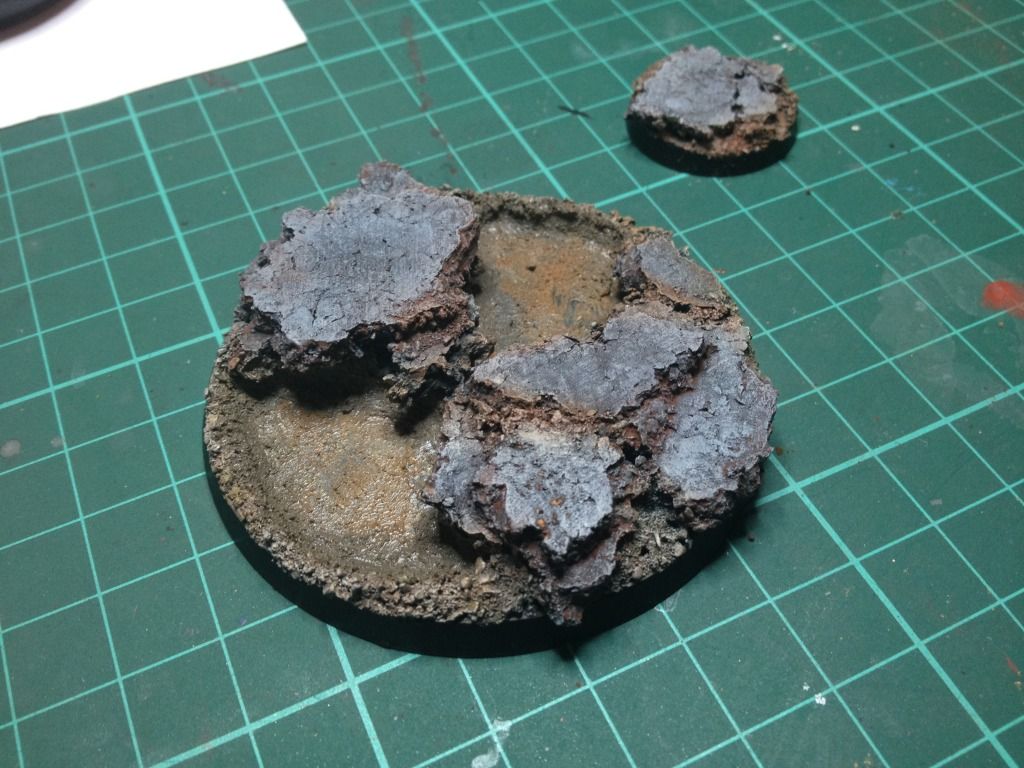
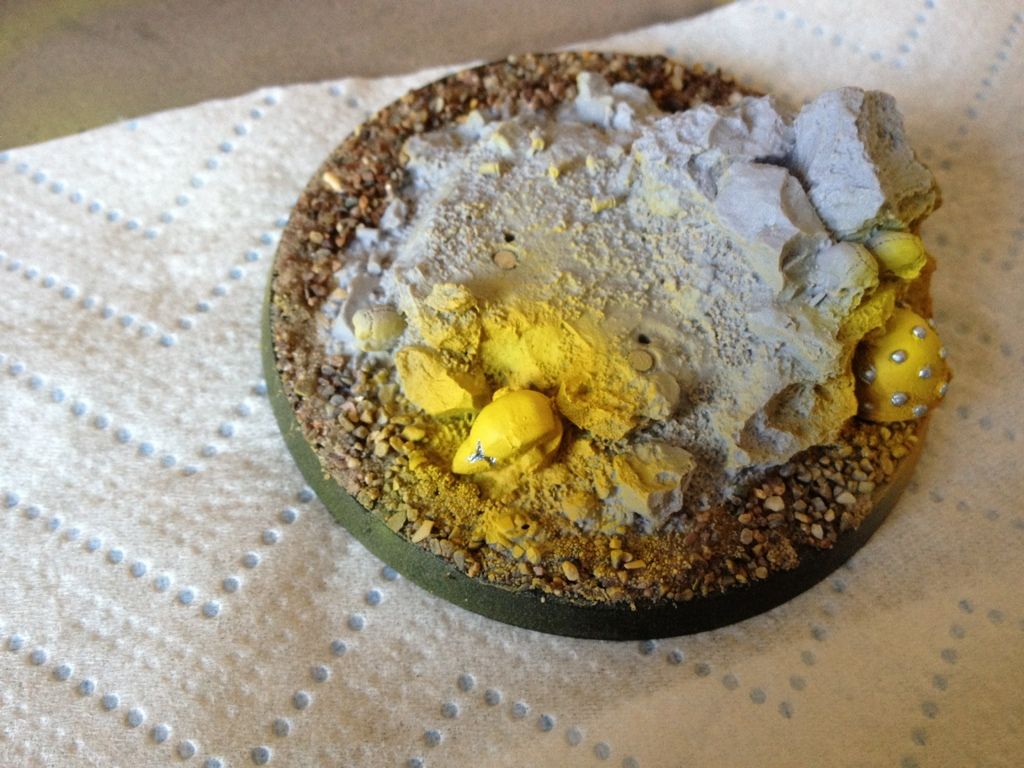
The Dreadnought base has been finished. Very happy with the way it has turned out. Was exactly the effect I was going for. Now I just need to finish off a few missed details on the Dread itself (some lenses need finishing and the under slung weapons attaching) and it will be done and ready to crush foo's.

Wednesday, 10 October 2012
Furioso Dreadnaught base WiP
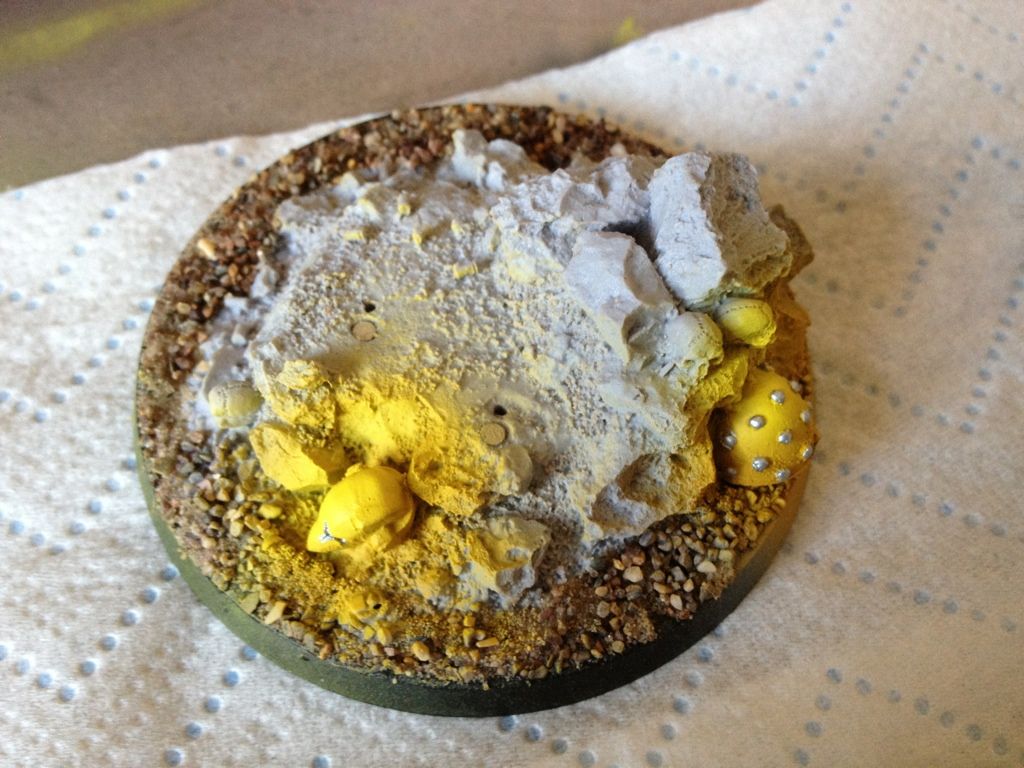
Finished most of the work required on the base last night in preparation to create the dirty water pools I am after. I have made sure that the depressions the mix will be poured into are water tight by filling around the edges with modelling putty and then once it has completely set putting a thin layer of PVA over the top of that and letting that dry. After that I have used Vallejo Sandy Paste, Brown Earth Paste and Dark Earth Paste to create a muddied effect at the bottom of the pool.
It currently looks like this

I now have two options to use for the dirty water effect.
The first is a two part crystal resin kit that I used to create the water effect in this mini base


Some experimentation might be needed before I try this on the base for real.
It currently looks like this
I now have two options to use for the dirty water effect.
The first is a two part crystal resin kit that I used to create the water effect in this mini base


That wasn't my most successful pour by the way :) I managed to tidy that up quite a bit....in fact I will post a pic of that mini (Malifaux December Cult Ice Golem) when I remember. Now personally that is too clear for the effect that I am after. I want something that looks more like a muddy puddle with an effect along these lines. (Image from http://www.ediorama.com)

Looks like it was created using this stuff.

Friday, 5 October 2012
Furioso Dreadnaught WiP
Back before there was a Furioso model released that wasn't all metal and terrible I ran an ironclad as a Furioso. To be honest it works very well as one. Anyway it has had a repaint to fit in with the rest of the army. Pretty much done. It just needs a coat of Satin varnish now to bring down the gloss finish it was given before being oil washed. Then there will be some pigments applied around the engine exhausts and the feet to blend it in with the base. The base has had the two raised sections cut out and a circle of plasticard glued in underneath and then the gaps filled with revell model putty. I have then put in some debris for the dreadnaught to stand on and the two recessed areas will be filled to look like dirty water.


Tuesday, 2 October 2012
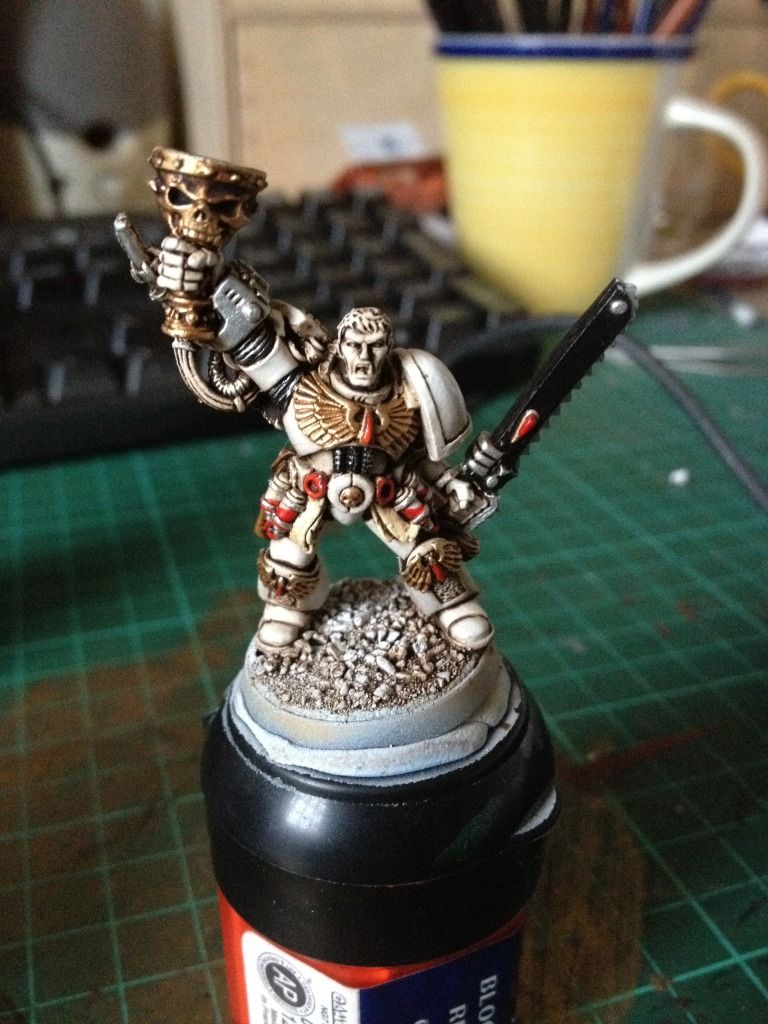
Blood Angels JP Chaplain
One Blood Angels Chaplain done....well ish. The metalics need neatening up a little bit but otherwise he is ready to cleave skulls!

On a related note I am very near done with my Blood Angels now. I have one or two pieces to finish off but that will be a LOT of hardwork and painting time done.....then they can go on eBay and pay for something shiny and new :)

On a related note I am very near done with my Blood Angels now. I have one or two pieces to finish off but that will be a LOT of hardwork and painting time done.....then they can go on eBay and pay for something shiny and new :)
Wednesday, 12 September 2012
Mephiston 99% done
OK that is Mephiston pretty much done. He needs a bit of OSL around the plasma pistol and that is job done. Very happy with the way he has turned out.


Wednesday, 5 September 2012
Mephiston WiP - getting there!
Bit of a major push on Mephiston last night. Almost all of the main colour detail has been done, then gloss varnished and some oil washes and shading applied. Not happy with the detail on the face so that will be touched up as well as the blue shading on the winged areas needs neatening up. Should be done in the next couple of days.
Excuse the shinyness of the pics, the gloss varnish used to protect the acrylic layers from the oil wash does not make a good photographic subject. Ultimately once it is finished it will get a coat of satin varnish to bring everything back down.


Excuse the shinyness of the pics, the gloss varnish used to protect the acrylic layers from the oil wash does not make a good photographic subject. Ultimately once it is finished it will get a coat of satin varnish to bring everything back down.


Wednesday, 29 August 2012
Mephiston WiP - Cloak detail
Mephiston enters his 4th paint scheme (and final!) So far I have only worked on the cloak detail. I painted it gold first and highlighted and shaded it then masked out the detail I wanted to come through then airbrushed the red layers over before finishing off with some blended shadows.


Next is an old limited edition Sergeant with jump pack.


Friday, 20 July 2012
Blood Angels Drop pod - started some weathering
Bit more progress last night. The beginnings of some weathering have been applied. A bit rough and ready at this stage but they will be built up upon tonight. When thinking about the weathering my thoughts were that this is a drop pod that would hurtle down through the atmosphere at a hell of a rate of knots before firing retro engines but will still hit the deck with some force. Therefore I have gone for vertical paint scratches on the doors and side fins and have started to apply some pigments to them to give that scorched motion effect. The base is being quite heavily layered in dark pigments to simulate atmospheric burn effect during entry.


Thursday, 19 July 2012
Blood Angels Drop Pod 90% done
A few quick and dirty pics of the Blood Angels drop pod I am working on. The main colour is all down. I need to finish the badges on the doors and then weather it and job done.


Wednesday, 4 July 2012
Curious Constructs - new webstore
A friend of mine who goes online by the name Col Gravis and runs a fantastic blog full of good content at http://colgravis.blogspot.co.uk/ has opened up a webstore to sell some of his sculpts. There is some great stuff on there, check it out at http://www.curiousconstructs.co.uk/
Thursday, 10 May 2012
Light tent finally up and running
A while ago I forked out a tenner on a cheap light tent from Amazon which has pretty much just sat there doing nothing. Well I finally cleared some space, assembled it and dusted off my DSLR which has been way under utilised recently.
So this is my first photo taken using a halfway decent set up (two daylight lamps, a tripod and a decent exposure).
The results

Hopefully it is a massive improvement on the iPhone pics I usually take. I need to work on the exposure a little bit and print off a decent graduated colour background as the white becomes rather stark and starts to wash out the colour on the mini but overall I am hoping it is as step in the right direction.
Thanks for looking.
Friday, 4 May 2012
Corbulo pic - this one is in focus!!
I should really not post picture updates late at night taken with just my daylamp as the sole light source. A slightly better pic of Corbulo from yesterday evenings work.


Thursday, 3 May 2012
Corbulo update
Most of the face and hair done this evening. A lot of blending in of tones and working out what worked best with the white armour.


Corbulo update
Sort of a "how to" post today. Although as my wife keeps telling me I would make a lousy teacher it is probably more of a "how I did this" post. My Corbulo 5th revision of paint scheme is coming along quite nicely. He has now been given a coat of satin varnish to seal in the oil wash. When working with oils it is very important to varnish your mini either side of the process as acrylics and oils do not play well with each other.
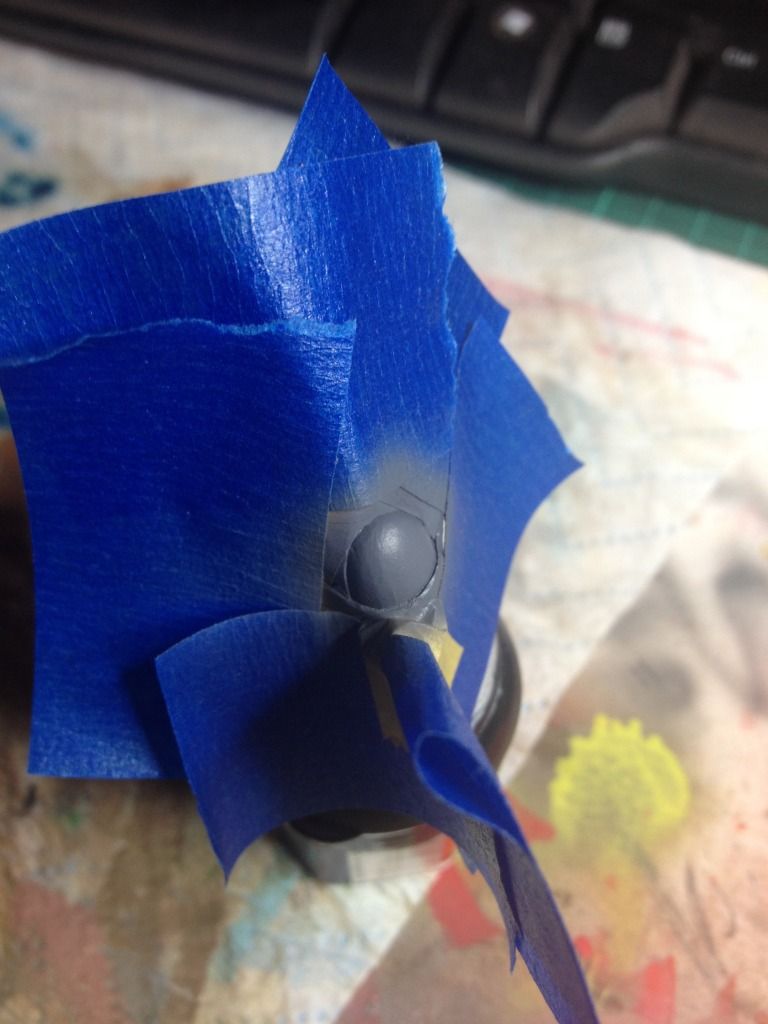
OK so I need to paint Corbulo's shoulder pad red. I could simply break out a brush and crack on but that would be far too easy :) So instead the shoulder pad is carefully masked off and the area primed with Vallejo Air Grey Primer, not the new polyurethane primer this is the standard darker grey primer. Although I have moved over to the Vallejo polyurethane primers for most work now, my Blood Angels army was already in progress before I discovered the new primers so I am keeping continuity with them.
OK masked the area.

Grey Primer


OK so I need to paint Corbulo's shoulder pad red. I could simply break out a brush and crack on but that would be far too easy :) So instead the shoulder pad is carefully masked off and the area primed with Vallejo Air Grey Primer, not the new polyurethane primer this is the standard darker grey primer. Although I have moved over to the Vallejo polyurethane primers for most work now, my Blood Angels army was already in progress before I discovered the new primers so I am keeping continuity with them.
OK masked the area.
Grey Primer
Next is the colour detail, the pad was filled with VGC Bloody Red, then a shadow along the base of VGC Bloody Red and Dark Fleshtone and a highlight along the top of Bloody Red and Hot Orange.

Then finally, carefully remove the masking tape.
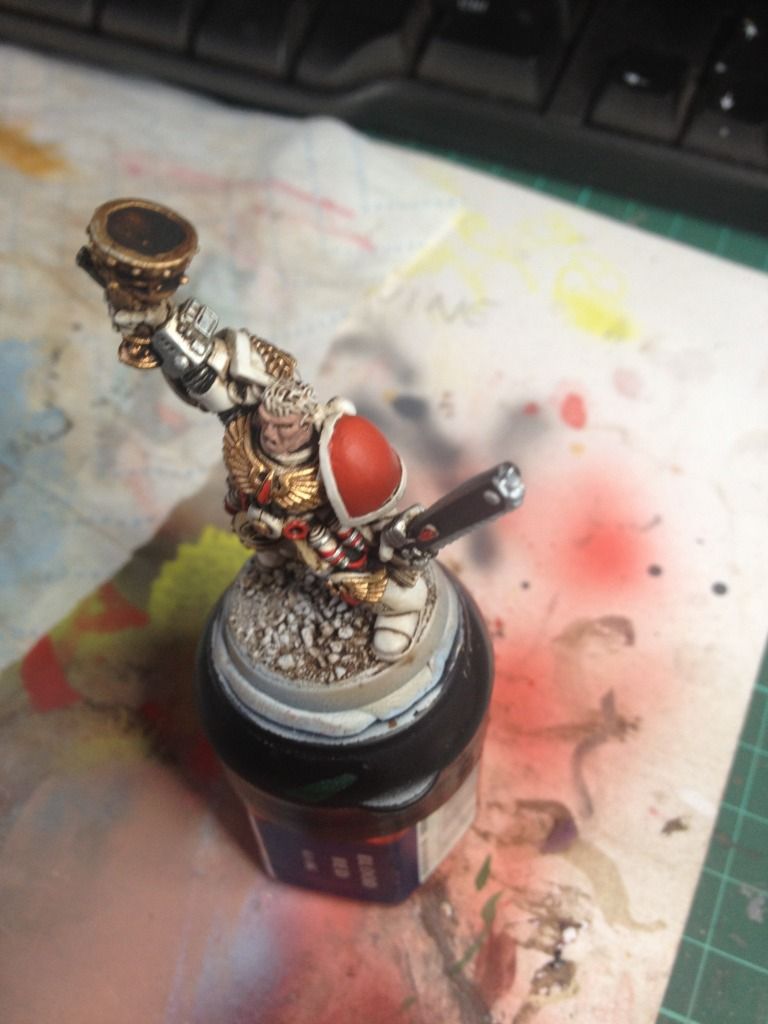
Et Viola, one red shoulder pad. Next up will be face detail.
Monday, 30 April 2012
25th anniversary mini wip and some sanguinary priests
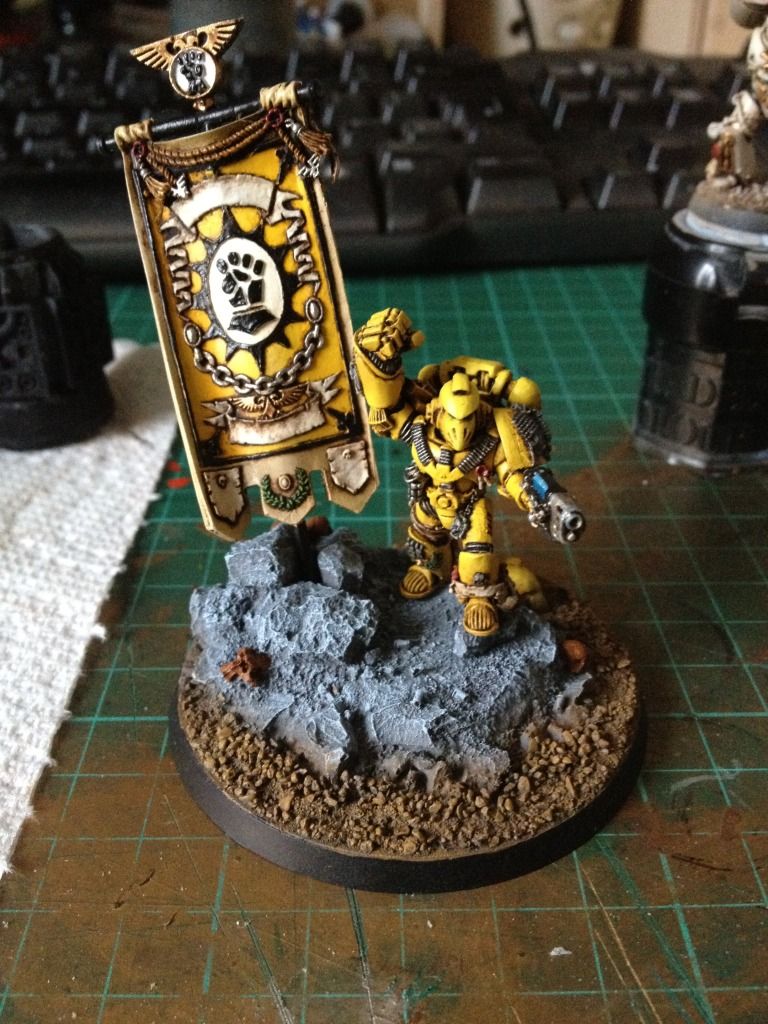
OK after having left this at my FLGS last week by accident I got my 25th anniversary Imperial fist back on the bench this weekend and made some headway into the banner. More of the detail has been filled in, a gloss varnish applied and an oil wash. On the home stretch with this one now. Need to finish the base detail and the orks head and then decide if I want to do any source lighting around the plasma pistol....undecided on that at the moment.

Next up are a couple of Sanguinary Priests on the bench, one is the Corbulo model who is probably on his 5th paint scheme now :) For some reason I really don't like painting this mini. I don't especially like the pose but I have had him for years and is pretty much part of my Blood Angels furniture so to speak. He has had his armour detail pretty much done and an oil wash as well which was then cleaned up. Just need to do his face and hair now and he will be pretty much there.


Next up are a couple of Sanguinary Priests on the bench, one is the Corbulo model who is probably on his 5th paint scheme now :) For some reason I really don't like painting this mini. I don't especially like the pose but I have had him for years and is pretty much part of my Blood Angels furniture so to speak. He has had his armour detail pretty much done and an oil wash as well which was then cleaned up. Just need to do his face and hair now and he will be pretty much there.
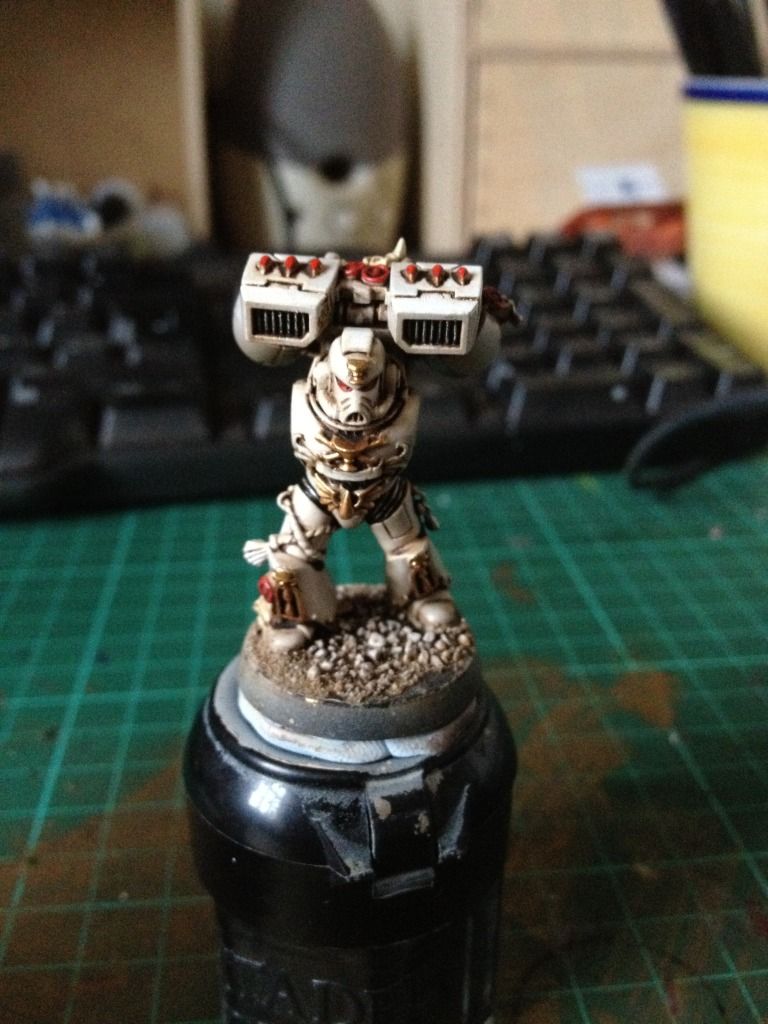
Lastly a jump pack Sanguinary Priest kit bashed from the Death Company sprues. Painted using the same technique as Corbulo.
Thanks for looking.
Tuesday, 24 April 2012
25th anniversary mini update
Work hath started on the banner. Hopefully have it finished in the next couple of nights.


Monday, 23 April 2012
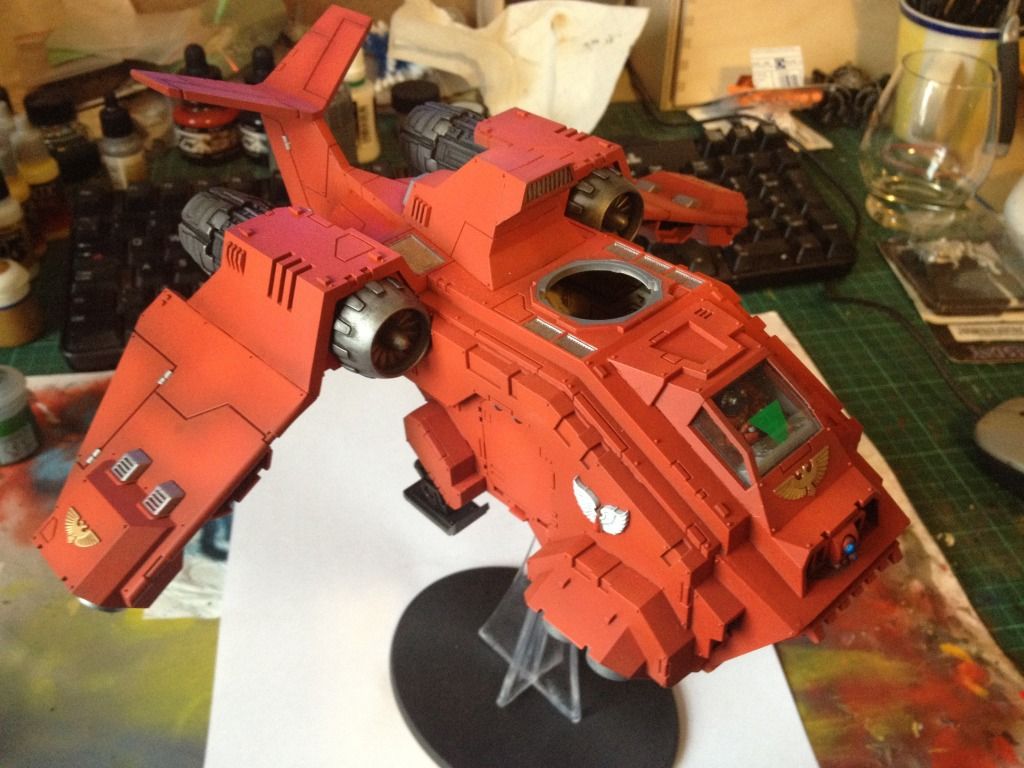
25th Anniversary mini update and Storm Raven WiP pics
A couple of update pics for my 25th anniversary mini done in Imperial Fist colours. Quite happy with the way this is turning out as I have not painted yellow in a long time. The mini is essentially finished now. He needs a coat of satin varnish to seal the oil wash and some text details on the various scrolls but I can start working on the banner now and finish of the base details, There are some skulls and shell casings that need picking out.

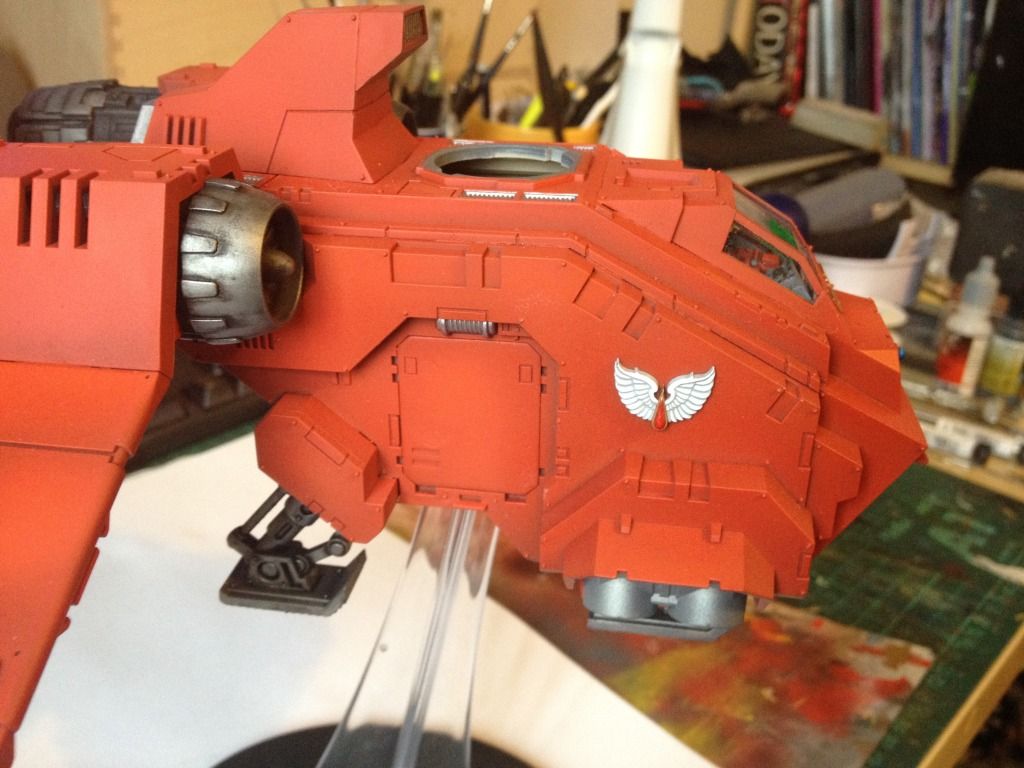
And next up just a few WiP shots of my Storm Raven. Want to get this done and dusted and off the project shelf and onto the gaming table so will try and finish her tonight. She has been satin varnish so is ready for the final washes to really pop the shadows out and compliment the highlights. Then I need to sort something out for the turret. I am not a fan of the manned turret it comes with so am thinking of ways to change it at the moment.
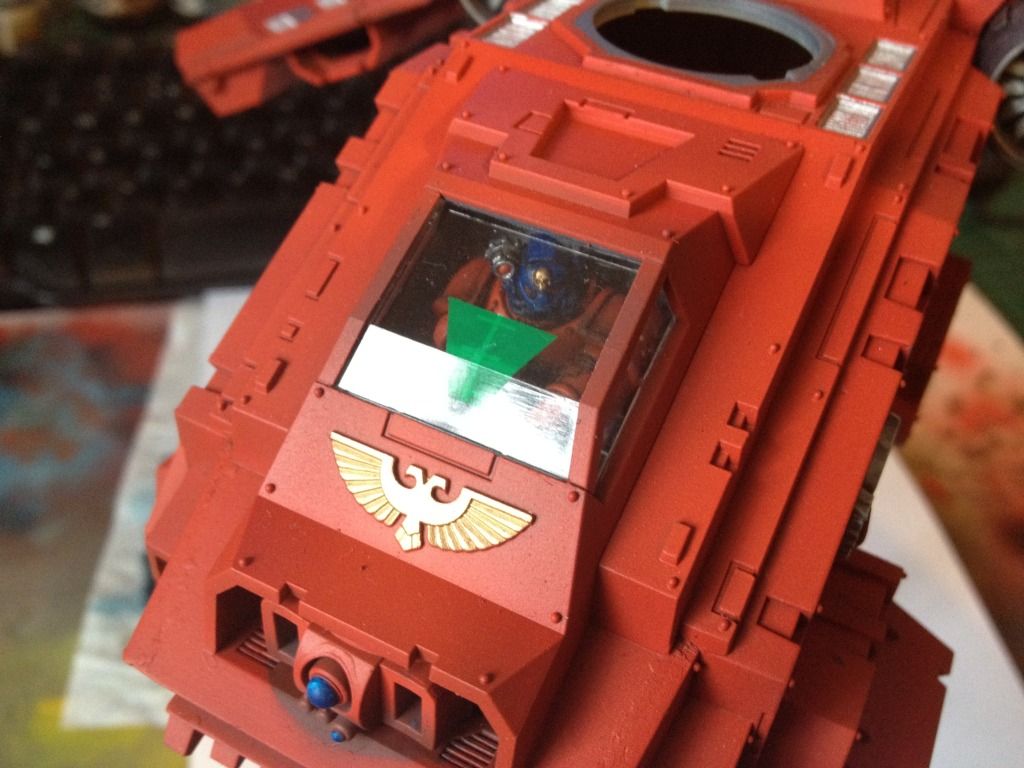
I have given the pilot a HUD for a bit of fun. It was painted using clear green paint.
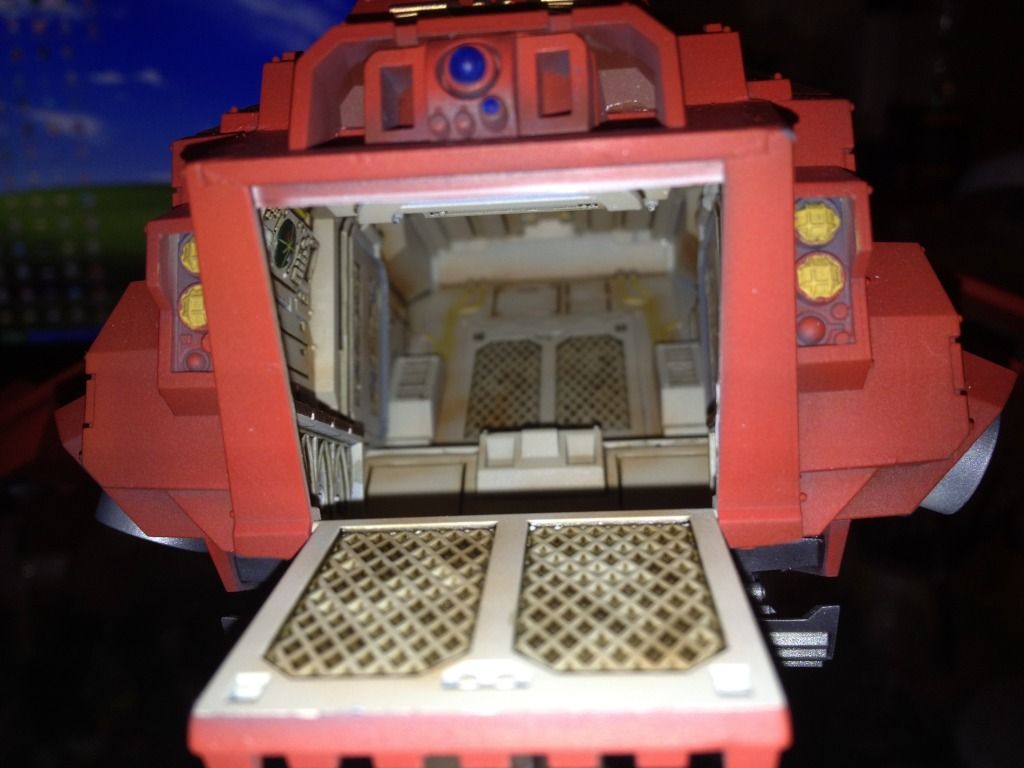
Lastly a quick shot of the interior detail. And also a reminder to me that I need to finish the searchlights off at the front.
Tuesday, 17 April 2012
25th anniversary 40K mini
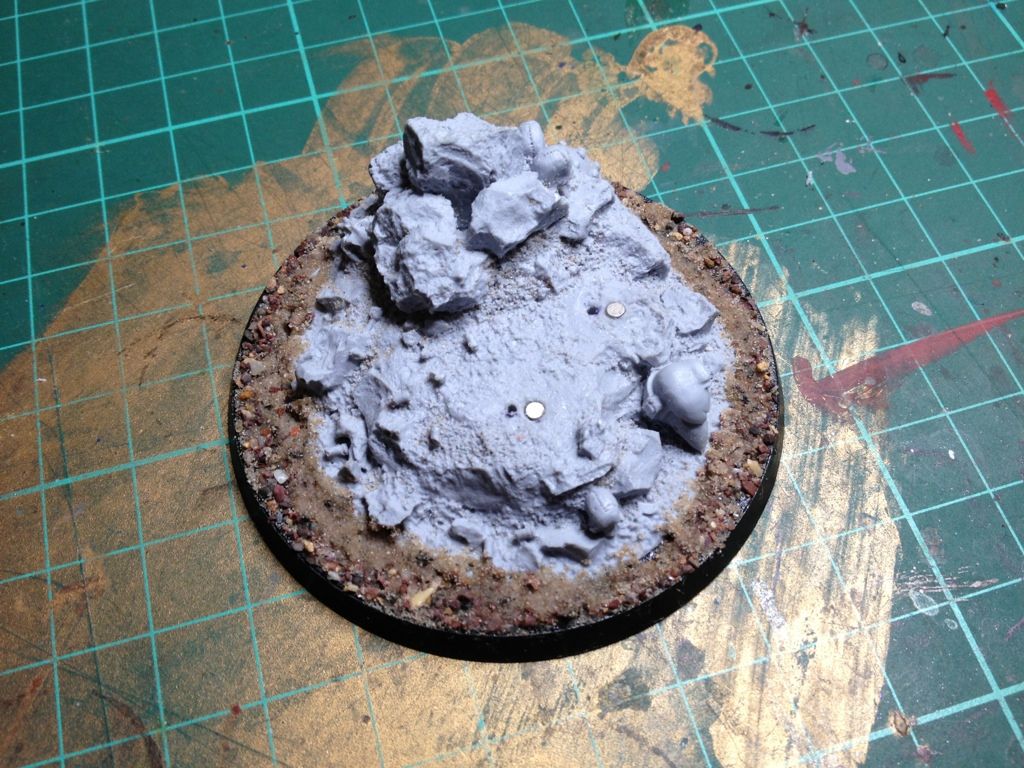
I picked up one of the Warhammer 40K 25th anniversary mini's from my FLGS http://www.ironhavengames.co.uk/ when they were released. Thankfully my finecast sculpt was actually very good, just the usual flash lines to clean up, no malformed parts and no bubbling that I could see.
I want to be able to display the model on its presentation base or on a normal round base for gaming if required. This means magnets. I have drilled to pin holes to guide the mini in and keep it more secure.
 On the underside of the mini are also corresponding magnets and the pins.


I want to be able to display the model on its presentation base or on a normal round base for gaming if required. This means magnets. I have drilled to pin holes to guide the mini in and keep it more secure.
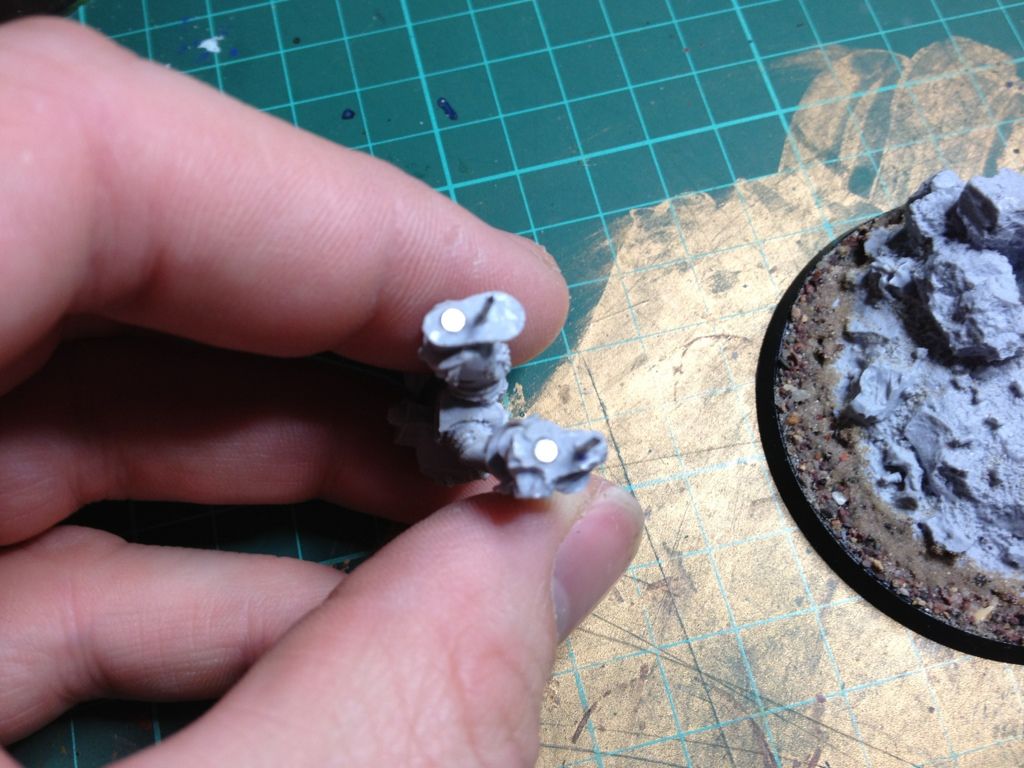
So the assembled mini sits correctly.
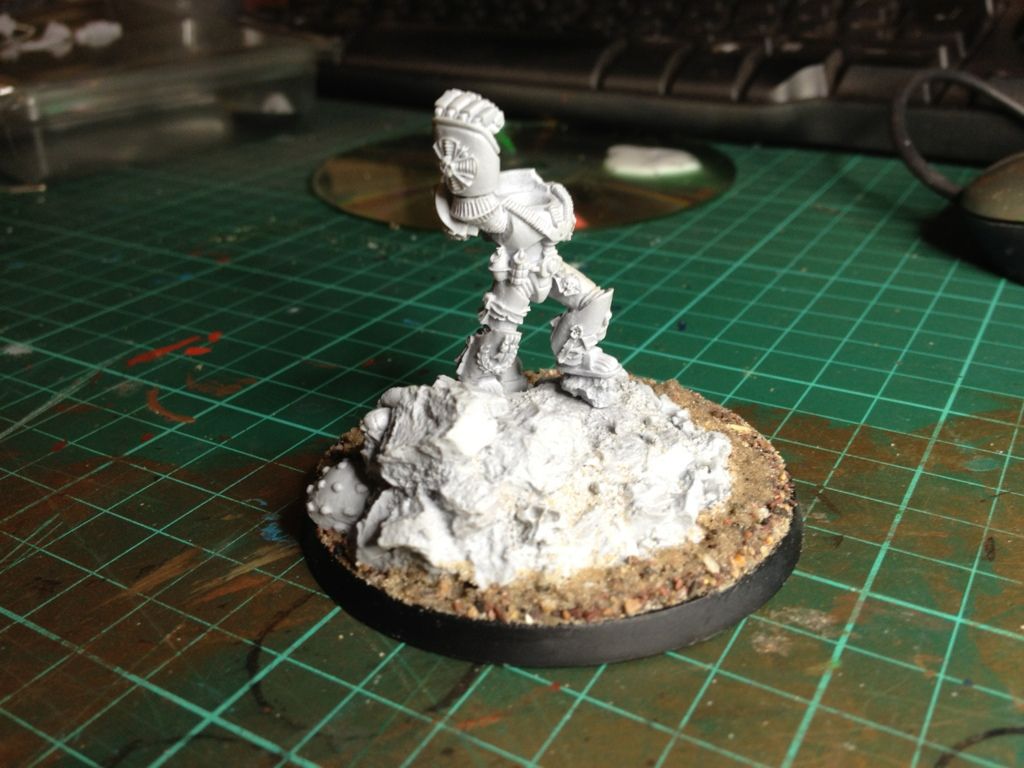
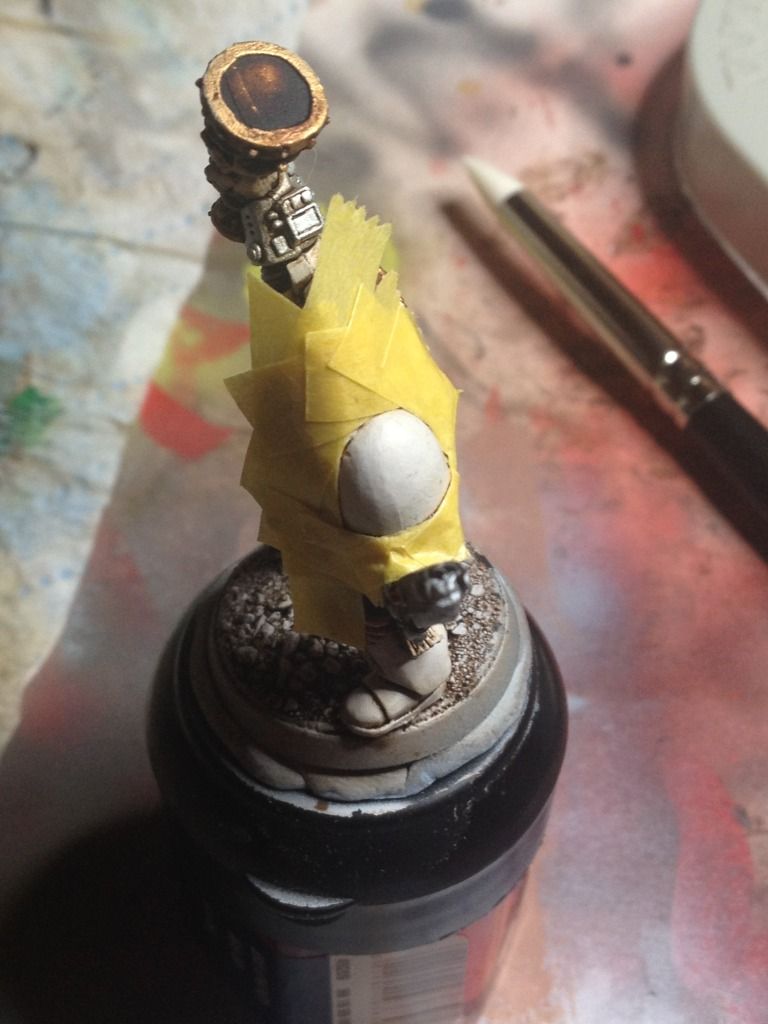
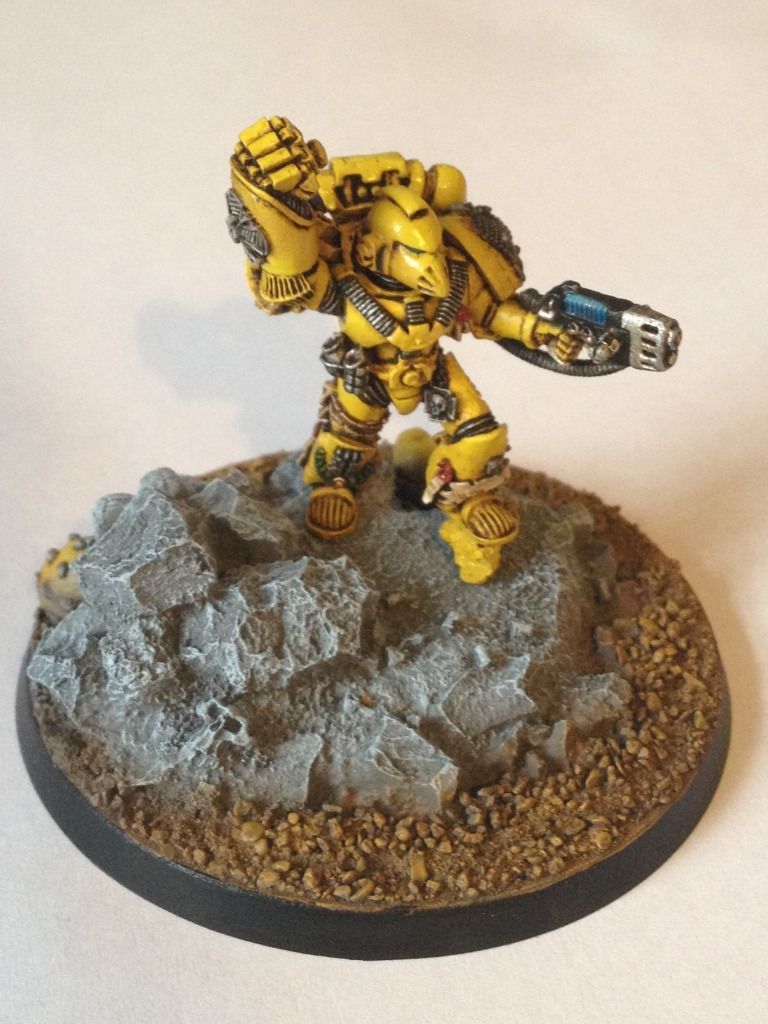
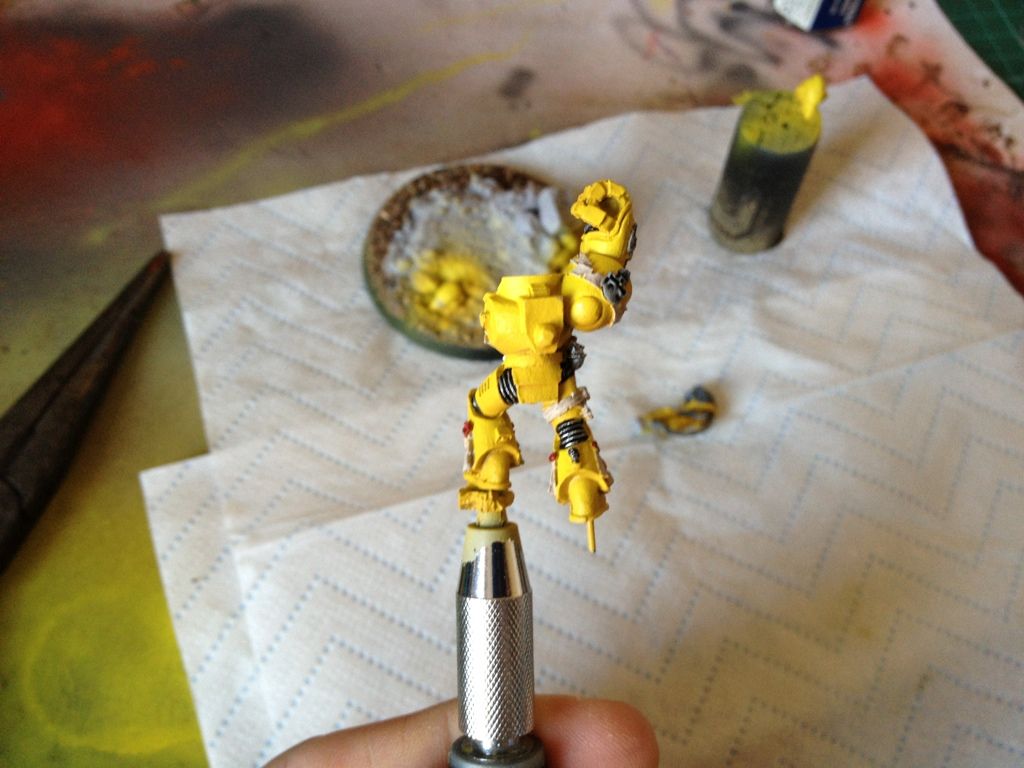
On to getting some paint on him. I have decided to go for an Imperial Fist colour scheme rather than the expected Crimson Fists. I like the challenge of painting yellow and I have in the back of my mind the possibility of building an Imperial Fist list at some point. The only challenge to the mini this means is that I will have to fill in the "Crimson Fists" name on the banner when I come to painting it. No biggy.
The colour scheme. I have undercoated with Vallejo Grey Polyurethane primer. I love this stuff, it goes on silky smooth through the airbrush and preserves all of the details. I have then airbrushed the whole mini in Vallejo Game Colour Plague Brown. After that I used VGC Sunblast Yellow applied at a 45 degree angle to create the main tone. Then VGC Bald Moon yellow was airbrushed almost vertically to give a stronger highlight. Looking at the resultant finish I think I will go back afterwards and do something I haven't done since I bought my airbrush. I am going to apply an extreme highlight. I think a very light yellow extreme highlight will lift the model a bit and once it has been varnished and then oil washed should settle into a lovely finish.
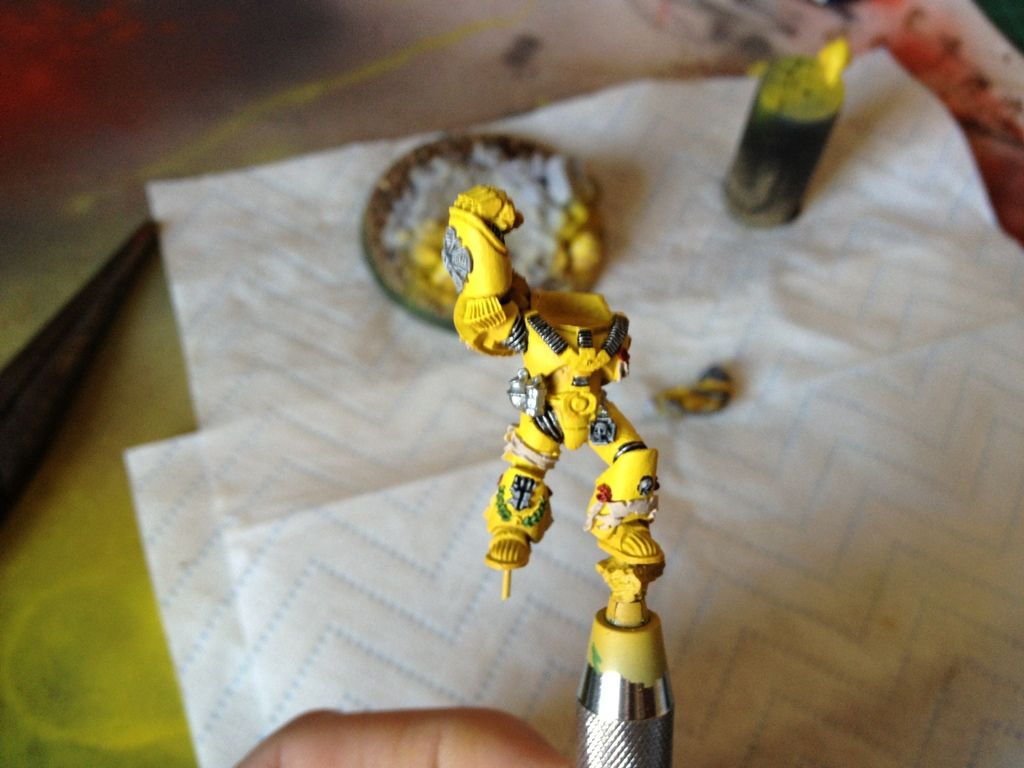
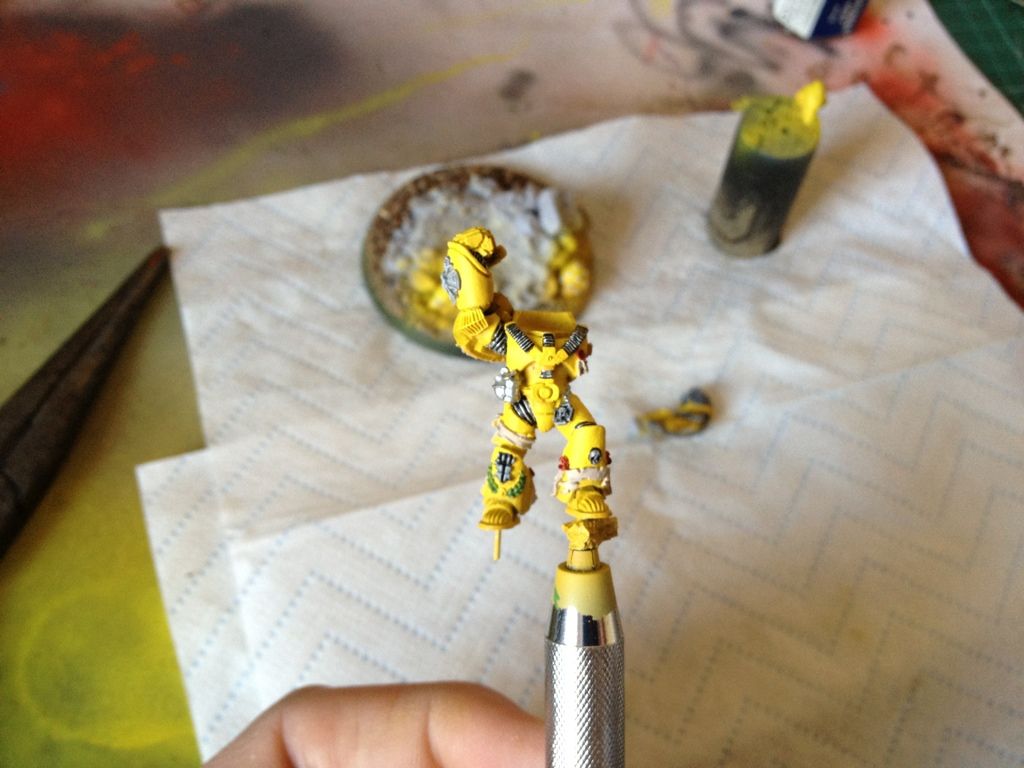
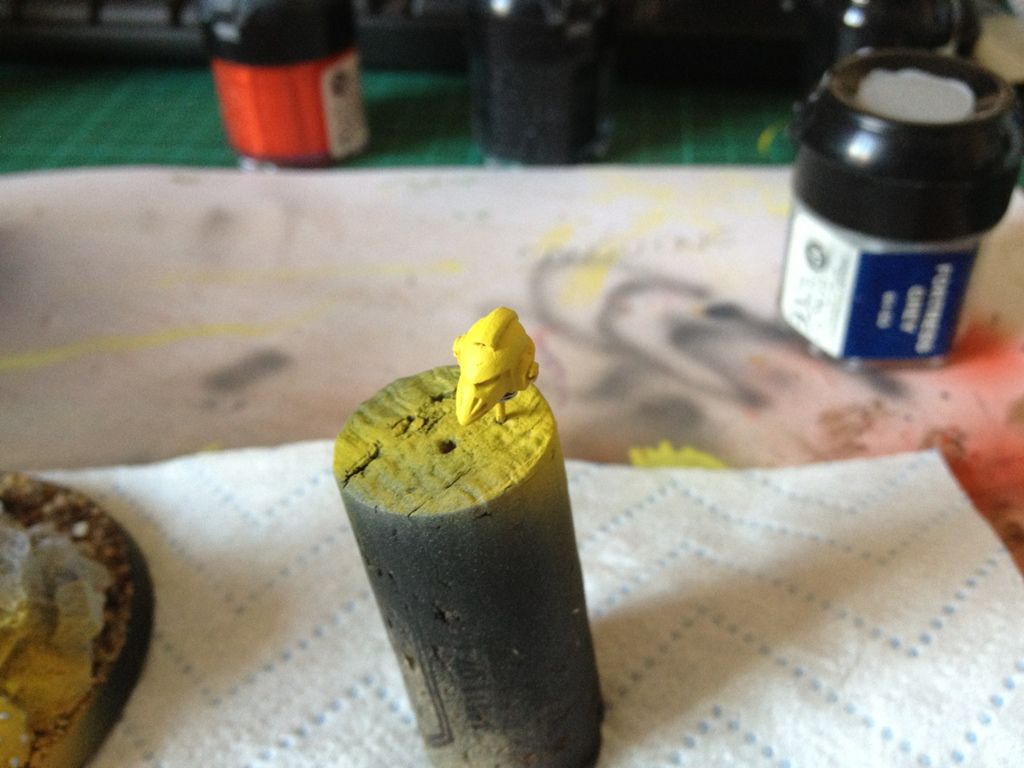
The base has been PVA'd and a couple of grades of sand applied to fill the whole base out. The same colours have been applied to the damaged helmet and shoulder pad. I will battle damage them more later.
Subscribe to:
Posts (Atom)