Friday 23 September 2011

Blood Angels Razorback - 2nd tank painted with airbrush

After pretty much finishing my blood angels Rhino I am keen to keep up the momentum and strip and redo all my Blood Angels tanks using the airbrush. Next up is my TLAC Razorback. 

The model has been stripped using fairy power spray. The result was pretty good. 

Next up the hull was primed using Vallejo Air Grey Primer. This was sprayed at about 30psi in wide sweeping passes with the airbrush constantly moving so no paint could build up. 


Next up the model was preshaded using Vallejo Game Colour Dark Fleshtone. This was thinned down quite a lot as my batch seems to be rather thick and gloopy and sprayed at a fairly low psi (about 15) so I could get in nice and close. I am thinning using the Vallejo Acrylic Thinner.


After this I gave the model several passes with VGC Bloody Red again at about 30psi. 


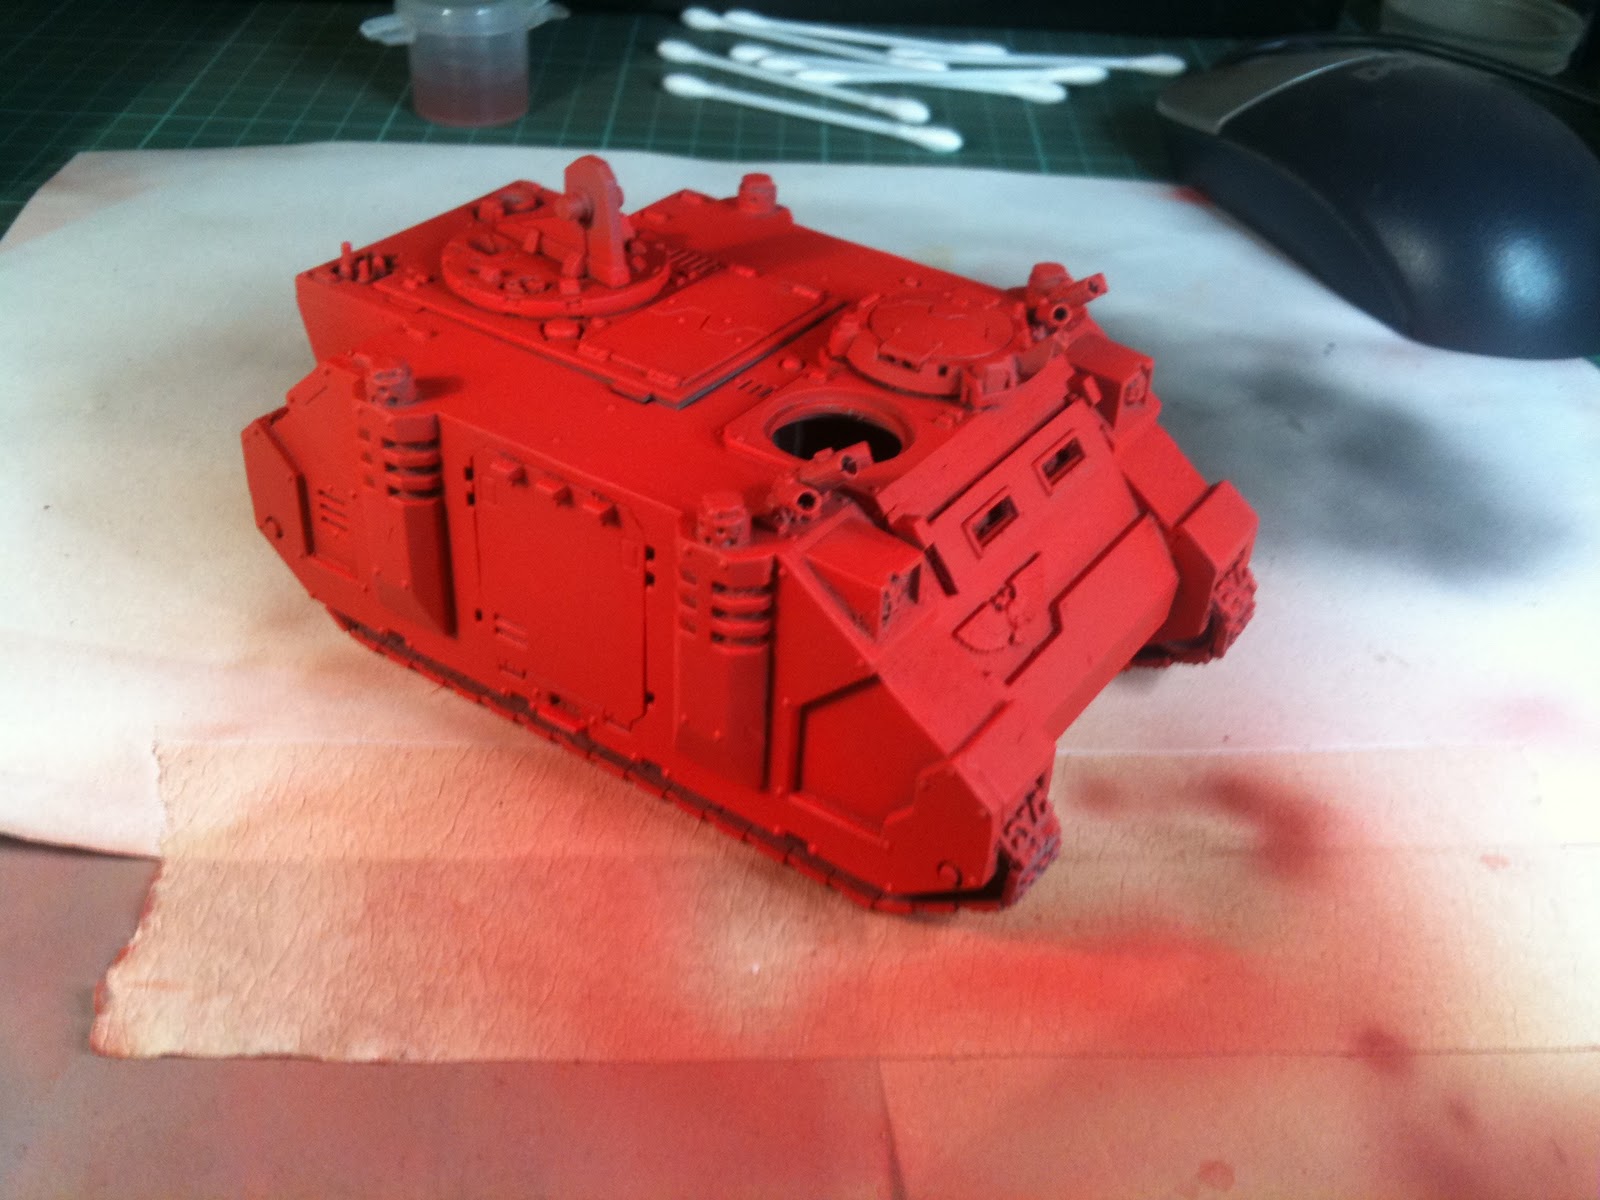
Then I panel filled the large areas with a 50/50 VGC Bloody Red/Hot Orange mix thinned down at about 15 psi.


After that I made a few passes over the bottom half with a 50/50 VGC Dark Fleshtone/Bloody Red mix and then used that same mix to emphasis some of the shading around the chimney stacks and armour plates.


That's all for the moment. The wife is away on a hen do this weekend so expect a torrent of updates. Hoping to have this one finished, and my Vinidicator and a couple of Land Raiders for a friend in advanced stages by Sunday afternoon when my peace and quiet is shattered by her arrival back home :)

Wednesday 21 September 2011

1st attempt with new airbrush - Blood Angels Rhino

OK so a few weeks ago I picked up an Iwata HP-C from FleaBay and a compressor from www.everythingairbrush.com (recommend them by the way, arrived next day and gave great advise over the phone).

This is my first attempt at using it to paint a model. I started out by taking an old bit of plasticard I had lying around and spending about an hour, hour and a half just mucking about with the airbrush, trying different pressures through the compressor, trying different consistencies and finally felt comfortable enough to have a bash and painting an old Rhino I had stripped to experiment on.

Here is the result


For a first attempt I am really rather pleased about the way it came out. There are a few fingerprint marks on it so I need to learn to be more careful with my handling but otherwise I am rather chuffed. The finish is much smoother than I have been able to achieve with a brush, the gradient transition between shades is much smoother. Overall very happy. The Blood Angels logo was found on Google and then printed out, stuck with a glue stick onto Masking Tape and cut around to give me a template to work with. The hatch is having a few last bits and bobs done but otherwise she is finished. 

Monday 5 September 2011

Frozen water effect base WiP 3 - It all went a bit pear shaped

Oh dear.......that didn't go quite according to plan! After the frantic correction after the first pour attempt went a bit wrong, the finish really hasn't come out how I would have liked. There is a lip of resin around the top and the front is very uneven and not flat at all.


I think I will need to revisit the technique I used. I smeared vaseline across the plastic I was using as the barrier at the front to prevent the resin from sticking but it doesn't appear to have been very successful. I think next time I will paint a thin veneer of PVA across it. Wait for it to dry then do the pour and the PVA should just then peel off. Oh well, now I need to decide whether to try and repair this attempt or start again........decisions decisions

Friday 2 September 2011

Frozen water effect base WiP 2

OK so I attempted the pour last night. Had a crack at sculpting a Nemo....hmm my sculpting skills need working on is all I have to say about that. Maybe next time. The resin was easy enough to mix and has a very long (24hour) curing time which it seems is both good and bad.

Good because I don't need to worry about rushing and getting air bubbles in the mix and pouring it all in 60 seconds.

Bad because as it turns out the 1st attempt at this I interpreted the "the resin will cure faster if left next to a gentle heat source" part of the instructions as "hey if I shine my hobby lamp with daylight bulb, that will do the trick!!". These bulbs generate a fair more bit of heat than I anticipated and consequently it softened the Plasticine I was using to keep the mold in place to the point where when I checked it 30 minutes after the pour, the mould was no longer flush and I was leaking resin. Queue the A-Team music and a rather panicky clear up, reset of the mould and repour. Consequently I have no idea how the second pour is going to turn out but I suspect it will not be the neatest of finishes. I will remove it later and post up a pic.


Thursday 1 September 2011

Frozen water effect base WiP

For a while now I have been working on painting my Malifaux band. I loved the frozen pond effect on the Ice Golem and when I was pointed in the direction of a how to in Wyrd Miniatures newsletter I thought I would give it a crack. I am at the stage where most of the painting has been done. Next step is to shade the reeds to make them look more frozen and then do the resin pour.


Once the resin pour has finished and been given a good time to dry I will then dust some white over the surface and mount the golem and probably using some snow effect bring him into the base and try my hand at making some icicles to dangle on him.

I am also half thinking about trying my hand at sculpting a mini-nemo and freeze effecting him to go in the pond :)